 My Lists
 Classes
 Learning Center
Table Saw Tips
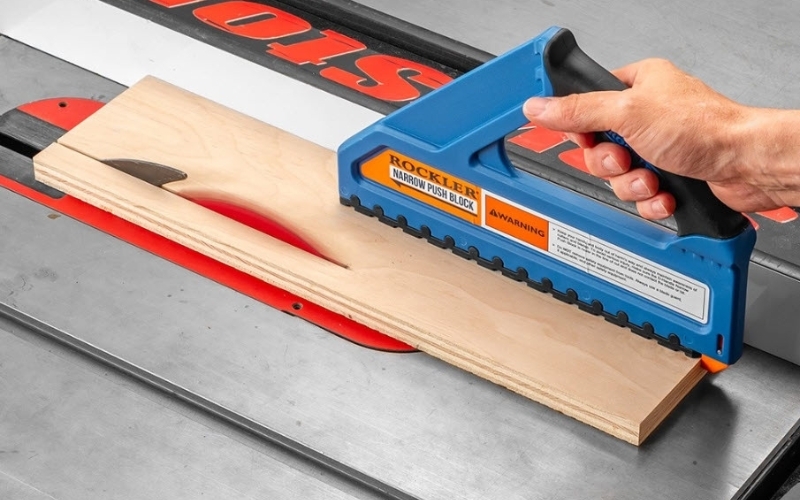
Table saws are perhaps the most multi-talented tools of the modern workshop, and the right tools and setup will let you tap into all those talents. This guide will provide some handy tips to get you started so you can get the most from your saw. We'll talk about basics like safety gear, setting up your saw, adding multi-purpose storage and essential accessories to make your table saw operations easy and accurate.
1. Make Safety Unforgettable
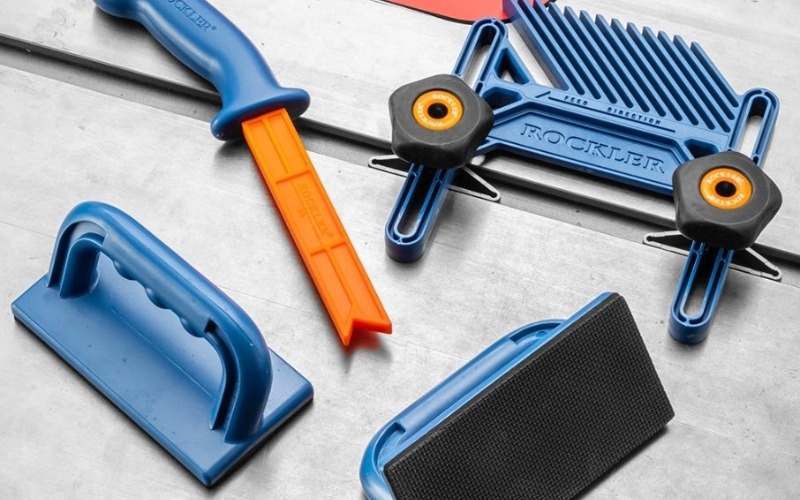
Being prepared is the first step to safe operation of your saw. That means having all the safety gear you need readily at hand. You should use have and use push sticks, push block, and featherboards. You can get a starter set that includes all three in the Rockler 4-Piece Safety Kit. Use each piece of safety gear in the appropriate situation. As always, eye protection is a must, and be sure to pick up a mask or respirator for when the fine dust is flying (definitely any time you're cutting MDF). Our Ear Protection Options include many that will replace the noise with the music or podcast of your choice.
 |
Table Saw TipTo prevent rust and reduce friction when feeding stock through the saw, keep the surface of your cast iron table waxed or oiled. A popular spray-on treatment for saw tables is Bostik GlideCote Table & Tool Surface Sealant. Another option that's handy to keep around the shop anyway is Paste Wax. Just wipe it on, let it dry and buff it out. |
2. Line Up Your Blade and Fence for Precision Cuts
Before you make your first cut, be sure to check whether the blade is aligned properly with the miter slots. Learn how to do it by watching the video above. For even greater precision, reach for a digital Table Saw Alignment Gauge to do the job. Once that's done, you'll also need to align your rip fence with the blade. It will be explained in your table saw owner's manual. When these two simple adjustments are done, your saw will make rip cuts better than ever before!
|
Table Saw TipA dial indicator is a nice tool to have for tuning up your table saw and other machines. This Table Saw Alignment Gauge from Rockler fits in your saw's miter slots, making even the tiniest variances easily visible. |
3. Make Your Saw the Center of Your Shop

With the capability to rip and crosscut large materials, and also cut fine joinery, the table saw should command the center of your shop with plenty of clearance on all sides. Measure the infeed and outfeed clearances to be sure you have enough room for your maximum stock length to feed into and out of the saw, plus at least three additional feet of buffer. If you'll be crosscutting, be sure to leave plenty of clearance on the left and right as well. Giving your saw plenty of elbow room will allow you to use it for all of its potential uses.
4. Mobilize Your Saw to Maximize Space
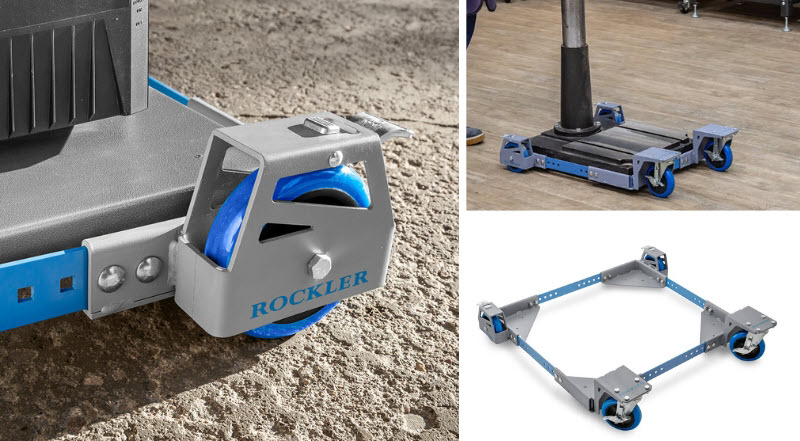
For small shops and garage shops, a mobile base is an essential add-on for your table saw. It lets you wheel your saw into the middle of the shop and then back to the wall when you need to use other machines, or to park your car. Rocker offers numerous mobile base options, including the All-Terrain Mobile Base shown above, which can be customized in size to accommodate your specific saw.
5. Add Outfeed and Side Support for Managing Long and Large Workpieces
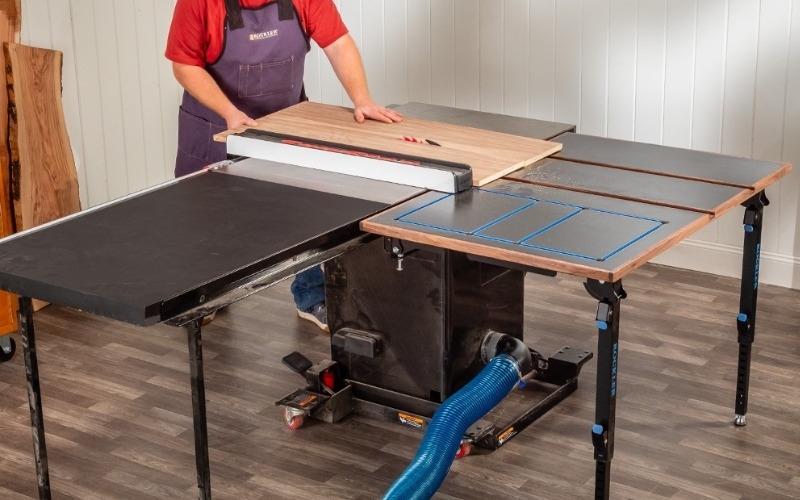
Adequate outfeed support and side support is essential when cutting up large panels and long stock. Consider building your outfeed table the same height as your saw so it can double as a storage table, assembly or sanding table, router table and more. Or, you can add outfeed support as a hinged assembly to the back of your saw. This Rockler Rock-Steady Folding Table Saw Outfeed Kit (above) makes the process easy and lets you tip your outfeed table down and out of the way when you aren't using it.
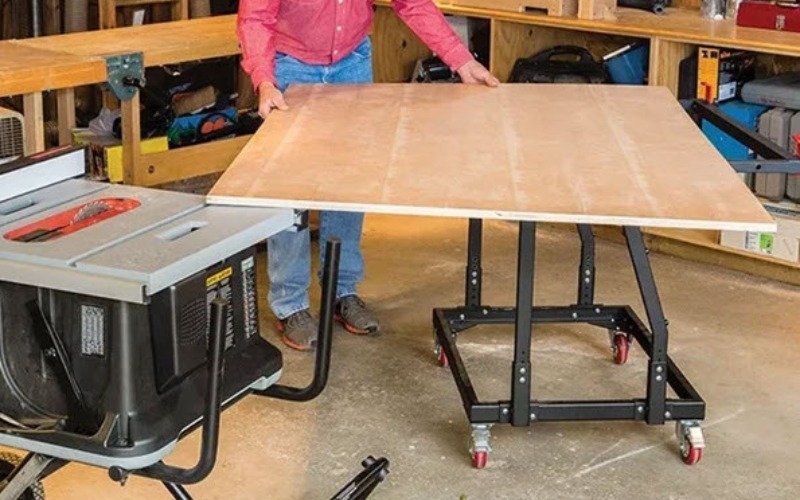
|
Table Saw TipGetting big sheets of plywood on the saw can be taxing on your back. For an amazing solution that lets you wheel whole sheets of plywood straight from the truck bed to your saw, check out the Material Mate Panel Cart and Shop Stand. Not only will it save your back, but it can also double as an outfeed table — a great dual-purpose tool for small shops. |
6. Crosscut with Confidence
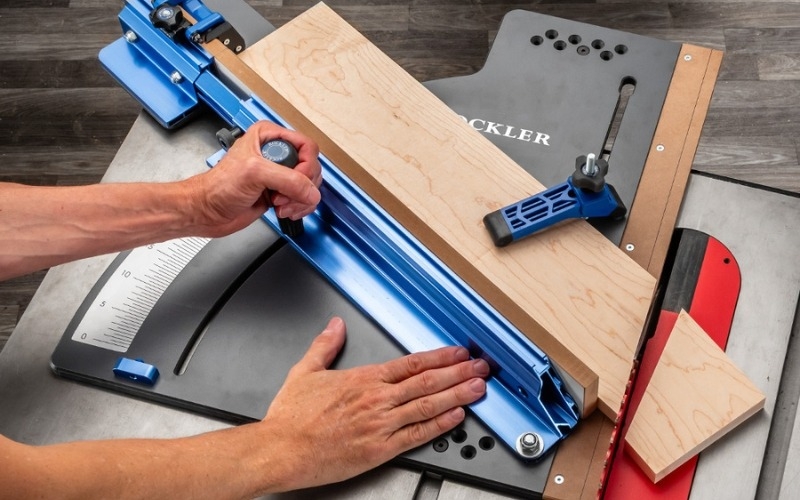
One of the most useful accessories for a table saw is a crosscut sled. When compared to the miter gauge included with your table saw, sleds offer much better material support, less friction, incredible accuracy with miters and the ability to add a material stop. They also help you cut tiny workpieces that would be unsafe to attempt using the miter gauge. While you can make a crosscut sled, it won't have the same range of features as a premium sled and drop-off platform, such as the two-part system shown in this video:
7. Capture Dust Right Out of the Gate

If you own a contractor saw, the bulk of the sawdust is thrown below the table as the blade plows through the cut. Use a contractor table saw dust bag to capture this dust and prevent it from being spread around the shop. For any saw, make sure you leave the blade guard in position to keep the chips out of your face, and be sure to connect a hose to the blade guard if it's an option.
Use a dust collector with at least a 4" diameter hose, and 350 to 450 CFM for the table saw alone (not including dust collection at the blade guard). Our Wall-Mount Dust Collectors, available in a 650 CFM model and a 1250 CFM model, are great for small shops where space is at a premium. We also offer a 750 CFM model that rolls on casters so you can move it from machine to machine. Also consider using a two-stage dust collector. With a system like this, the heavier chips fall into a separate container before ever reaching the dust bags. This means you won't have to empty the bags as often, and your dust collector will maintain strong suction for longer. You can build your own two-stage system with our 4" Dust Separator Components and FREE plan. Note that this kit does not include hoses or hose clamps. A popular choice for the hose is our 4" Clear Flexible Hose and our 4" Keyed Bridge Hose Clamps to hold everything in place.
|
TipTo maximize suction on cabinet saws, use commonly available magnetic sheets to block up any openings in the cabinet. The curved slot for the saw tilt mechanism is a common point of leakage—cover it with a magnetic sheet and your suction will instantly improve. |

8. Choose the Right Blades and Take Care of Them
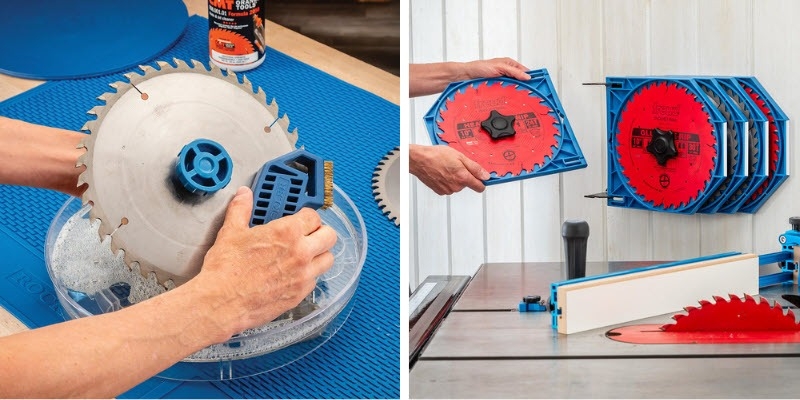
Choosing the right blade for the application at hand is crucial to making crisp, clean cuts that preserve as much material as possible. For a helpful guide on doing just that, see our article How Do I Choose the Right Saw Blade? Also, taking care of your blades by occasionally scrubbing off the pitch and grime, then safely storing them is the easiest and least expensive way to maximize their life. This Saw Blade Storage System from Rockler can keep your blade collection within easy reach and the teeth in pristine condition.
-
 Rockler Material Mate Panel Cart and Shop StandSpecial Price $239.99 Each Regular Price $299.99 Save $60.00
 -
-
-
Rockler Rock-Steady Folding Table Saw Outfeed KitSpecial Price $179.99 Each Regular Price $219.99 Save $40.00
-
Rockler All-Terrain Mobile Base—Holds Up to 1,000 lbs!Special Price $199.99 Each Regular Price $259.99 Save $60.00


Keep the inspiration coming!
Subscribe to our newsletter for more woodworking tips and tricks


